
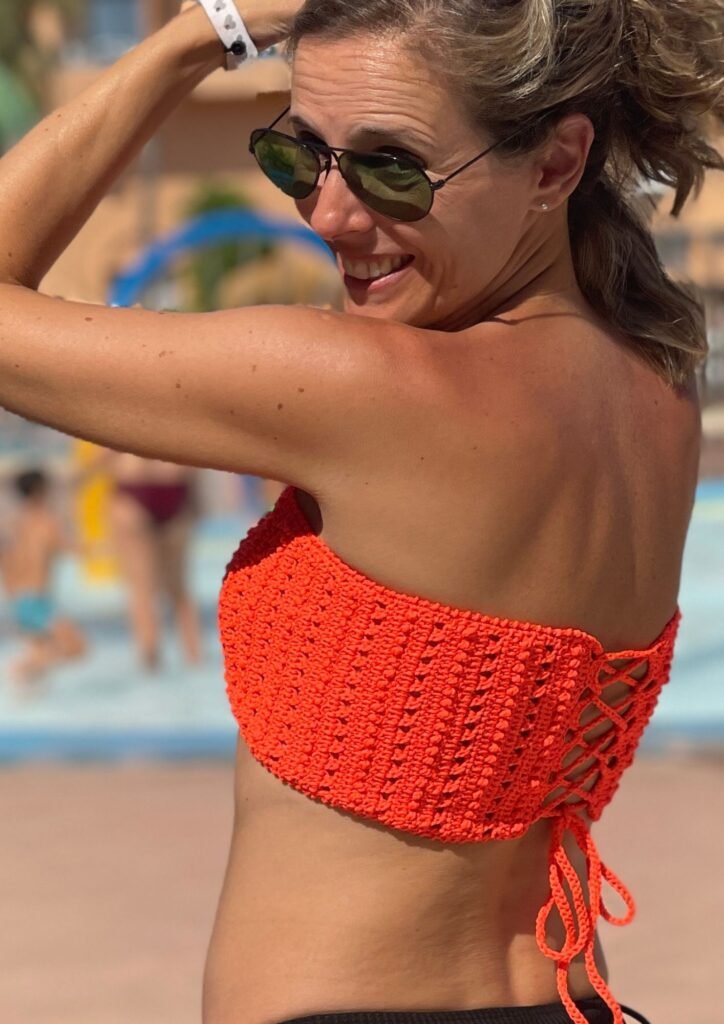
Some pieces are born to make you feel beautiful…
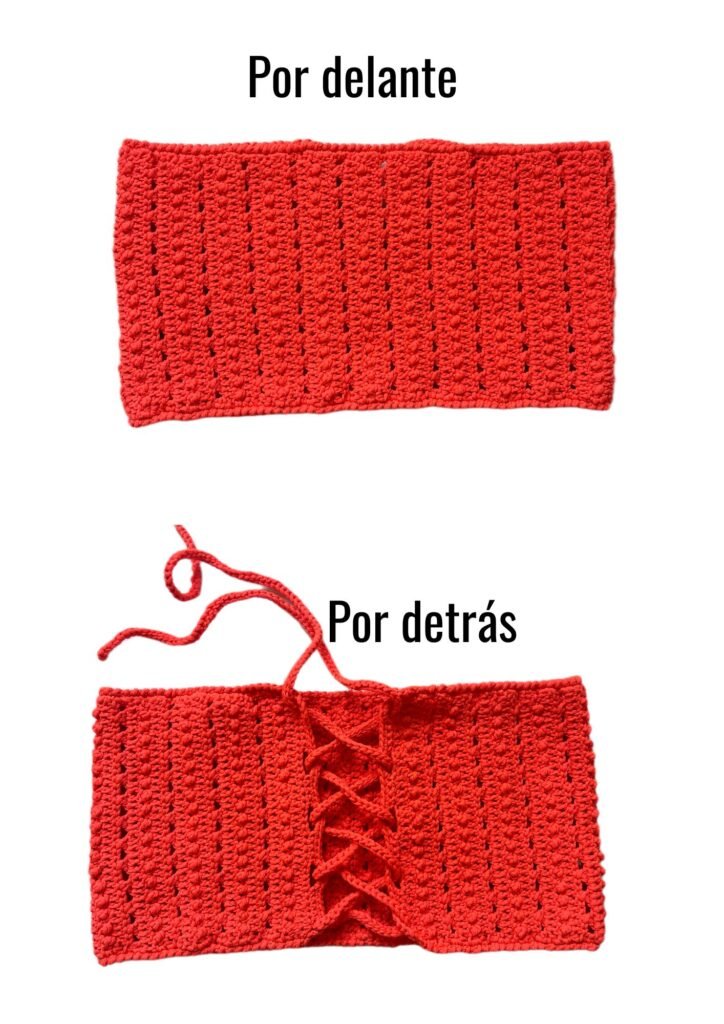
And this is one of them. A bikini top in the shape of a bandeau, or straight tube.
You can wear it as the top of your bikinis or as a summer top to dress up.
I chose Casasol’s special swimwear yarn because it is perfect if you plan to get it wet: it doesn’t lose its shape and it dries quite fast.
But if you plan to wear it in your summer outfits, you’ll find it very comfortable. I picture it with denim shorts, under a flowy blouse or with a kimono vest.
Its texture, the same one that won everyone over in the Luz Top, returns now reinterpreted in a Bandeau Bikini Top, creating an original, delicate and feminine fabric.
I designed this pattern “made to measure”, meaning it is a crochet guide to learn how to make this top in any size and for any body type.
It does not include step-by-step instructions for each size, but guidelines to make it in whatever size you want.
It is a project to enjoy slowly, exploring advanced crochet techniques and letting yourself be wrapped in the magic of every stitch.
The pattern includes written step-by-step instructions, a chart and supporting video tutorials to accompany you throughout the whole process.
I’m already imagining one in every color… Which one will you start with?
This pattern is for personal use only
Reproduction, distribution or sale of all or part of its content is prohibited
Selling the finished product is allowed, as long as you credit the designer: @lanamalacrochet
All rights reserved.
For questions, contact info@lanamalacrochet.com
Materials:
Yarn: 1 ball of Summer Loop by Casasol, enough for any size.
Composition: 100% recycled PES (polyester). Sport weight, 100 g/300 m (3.5 oz/328 yds).
You can use another yarn with similar characteristics.
3 mm (US D-3) crochet hook. 2 stitch markers. Scissors, tapestry needle and measuring tape.
Stitches used:
ch – Chain: Yarn over and pull the yarn through the loop on your hook.
sl st – Slip Stitch: Insert your hook in the stitch, yarn over and pull the yarn through the stitch. Then pull that same loop (without a new yarn over) through the loop already on your hook.
sc – Single Crochet: Insert your hook in the stitch, yarn over and pull up a loop. You will have 2 loops on the hook. Yarn over again and pull through both loops at once.
dc – Double Crochet: Yarn over, insert your hook in the stitch, yarn over and pull up a loop (3 loops on the hook). Yarn over and pull through the first two loops. Yarn over once more and pull through the last two loops.
tr – Treble Crochet: Yarn over twice and insert your hook in the stitch. Yarn over and pull up a loop (4 loops on the hook). *Yarn over and pull through the first two loops*. 3 loops remain. Repeat *. Yarn over once more and pull through the last two loops.
bub – Bubble: Work 1 tr and, in the next stitch, 1 sl st.
esc – Extended Single Crochet: Insert your hook in the stitch, yarn over and pull up a loop (2 loops on the hook), yarn over and pull through only one loop (you again have 2 loops on the hook), yarn over once more and pull through both loops at once.
cross – Cross: Ch 1, skip 2 stitches, work 1 dc in the third stitch, go back to the previous stitch and work 1 esc, crossing in front of the dc.
rev sc – Reverse Single Crochet (crab stitch): Work 1 sc in the previous stitch (working from left to right).
Gauge:
Swatch worked in the bubble and cross texture and blocked:
10 x 10 cm (4 x 4 in) = 22 dc x 12 rows
This gauge is only a guide; you don’t need to match any particular gauge, but it is important to practice it to decide which hook you will use for the whole project.
Practice the texture by working the swatch:
Ch 36.
Row 1 – Double Crochet (dc) – Ch 2 (counts as first stitch), 1 dc in the 4th ch from the hook and in every ch to the end.
NOTE: You can replace the 2 turning chains with 2 linked sc. You can use a hook half a size smaller for the Bub rows so your bubbles stand out well.
Row 2 – Bubble Row (Bub) – Ch 1 (turning chain, does not count as a stitch), 1 sc, *1 tr, 1 sl st* (the bubble should face you), repeat from * to * until the second-to-last stitch. Finish the row with 1 sc in the last stitch.
Row 3 – Double Crochet Row (dc) after a Bub row – Ch 2 (counts as first stitch), 1 dc in the first sl st, *1 dc in the tr, 1 dc in the sl st*, repeat from * to * until 2 stitches remain. Finish the row with 1 dc in the last tr and 1 dc in the sc.
Row 4 – Cross Row (Cross) – Ch 2 (counts as first stitch), *ch 1, skip 2 stitches, 1 dc in the third stitch, go back one stitch and work 1 esc in front of the dc*, repeat from * to * until 2 stitches remain. Finish the row with ch 1, skip the second-to-last stitch and 1 dc in the last stitch.
Row 5 – Double Crochet Row (dc) after a Cross row – Ch 2 (counts as first stitch), *1 dc in the ch (not in the space), 1 dc in each of the 2 stitches that make up the Cross*, repeat from * to * until 2 stitches remain. Finish the row with 1 dc in the last ch and 1 dc in the last stitch.
Repeat rows 2, 3, 4 and 5 until Row 19.
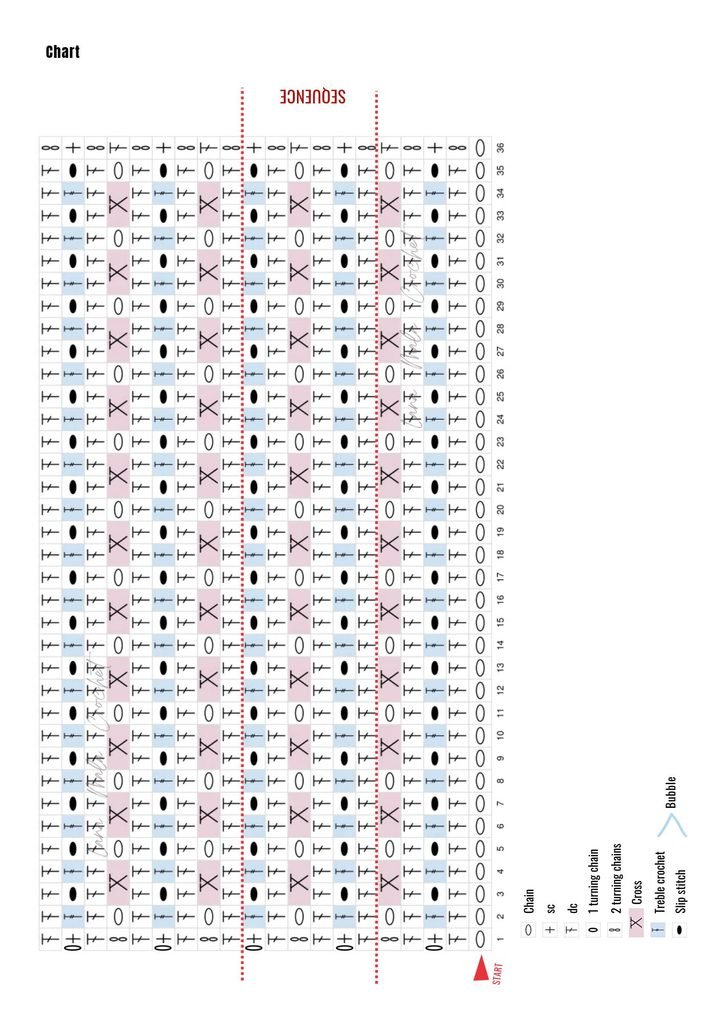
CHART:
VIDEO TUTORIALS (ENGLISH AUDIO AVAILABLE)
And the other one is for the cross rows:
CONSTRUCTION AND MEASUREMENTS:
The Luz Bandeau Bikini is a rectangle that closes at the back, corset-style.
It has a vertical tubular construction.
We are going to make it to measure.
The number of starting chains determines the width of the top, or “cup”.
The total number of rows determines the length of the top: your bust measurement minus about 18 or 20 cm (7–8 in), since this type of top is worked with very marked negative ease and we want it to fit very snugly.
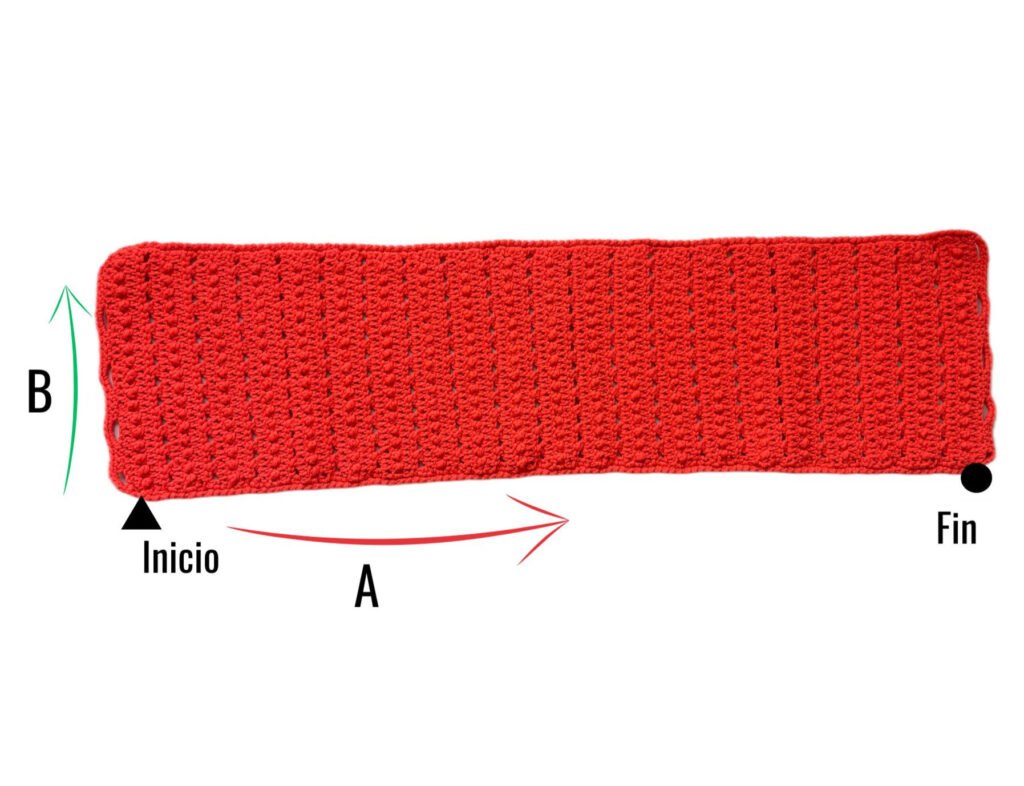
HOW TO DETERMINE YOUR MEASUREMENTS:
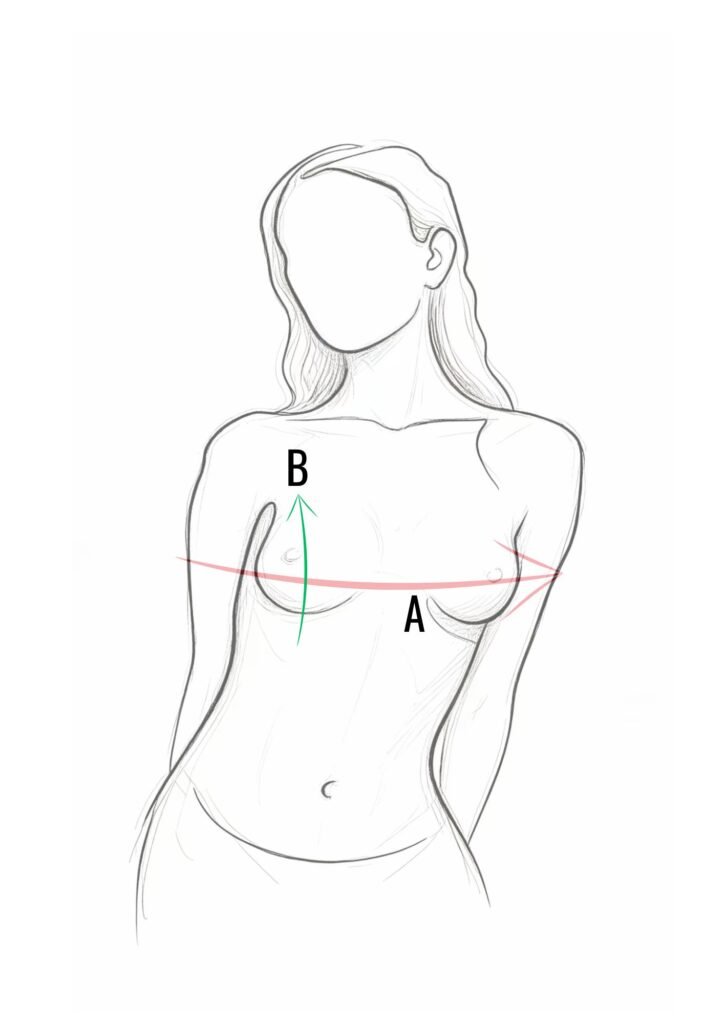
Measurement A (length): measure your bust and subtract about 18 or 20 cm (7–8 in). Write down the result. That will be the length of your rectangle.
Example: my bust measures 88 cm (34.5 in). So 88 − 20 = 68 cm (26.75 in) is the length of my rectangle.
Measurement B (width or cup): measure each breast vertically, from bottom to top at the fullest point. Write down the result. This will be the width of your rectangle.
Example: my breasts measure 15 cm (6 in). You can add or remove cm if you want more or less coverage. It looks nicest if you make it exactly to your measurements or subtract a cm or so.
VERY IMPORTANT BEFORE YOU START:
You’ve taken your measurements; now we need to adapt them to the multiple of our texture:
- For Measurement A, the last 2 rows will always be Bub and dc, so your top ends the way it started.
- For Measurement B, the starting chain will always be a multiple of 6, so you need to find the multiple of 6 closest to your Measurement B. It can be 18, 24, 30, 36, etc. If in doubt, I recommend choosing the lower number.
Each row tells you whether to work dc, Bub or Cross:
- Dc and Cross rows begin with ch 2, which count as the first stitch. Always mark it.
- Bub rows begin with ch 1 as a turning chain, which does not count as a stitch. In these rows you can use a hook half a size smaller so the Bub stands out well. Turn your work at the end of every row.
WRITTEN STEP-BY-STEP INSTRUCTIONS:
Row 0 or start:
Chain a multiple of 6 for your Measurement B.
Example: in my case, I made 30 ch.
Row 1, dc:
Ch 2, 1 dc in the 4th ch from the hook, 1 dc in each ch to the end. Finish all rows with the same number of stitches. Ch 1 and turn.
Row 2, Bub:
1 sc, *Bub: 1 tr, 1 sl st*. Repeat from * to * until the second-to-last stitch. 1 sc in the last stitch. Turn.
Row 3, dc:
Ch 2, 1 dc in each stitch to the end. Turn.
Row 4, Cross:
Ch 2, *ch 1, skip 2 stitches, Cross: 1 dc in the next stitch, 1 esc in the previous stitch*. Repeat from * to * until 2 stitches remain, ch 1, skip 1 stitch, 1 dc in the last stitch. Turn.
Row 5, dc:
Ch 2, 1 dc in each stitch to the end. Turn.
Row 6, Bub:
1 sc, *Bub: 1 tr, 1 sl st*. Repeat from * to * until the second-to-last stitch. 1 sc in the last stitch. Turn.
Row 7, dc:
Ch 2, 1 dc in each stitch to the end. Turn.
Following rows:
Repeat rows 2 to 7 until you reach Measurement A. Turn. Do not cut the yarn; continue with the finishing.
Example: in my case I worked a total of 83 rows.
FINISHING:
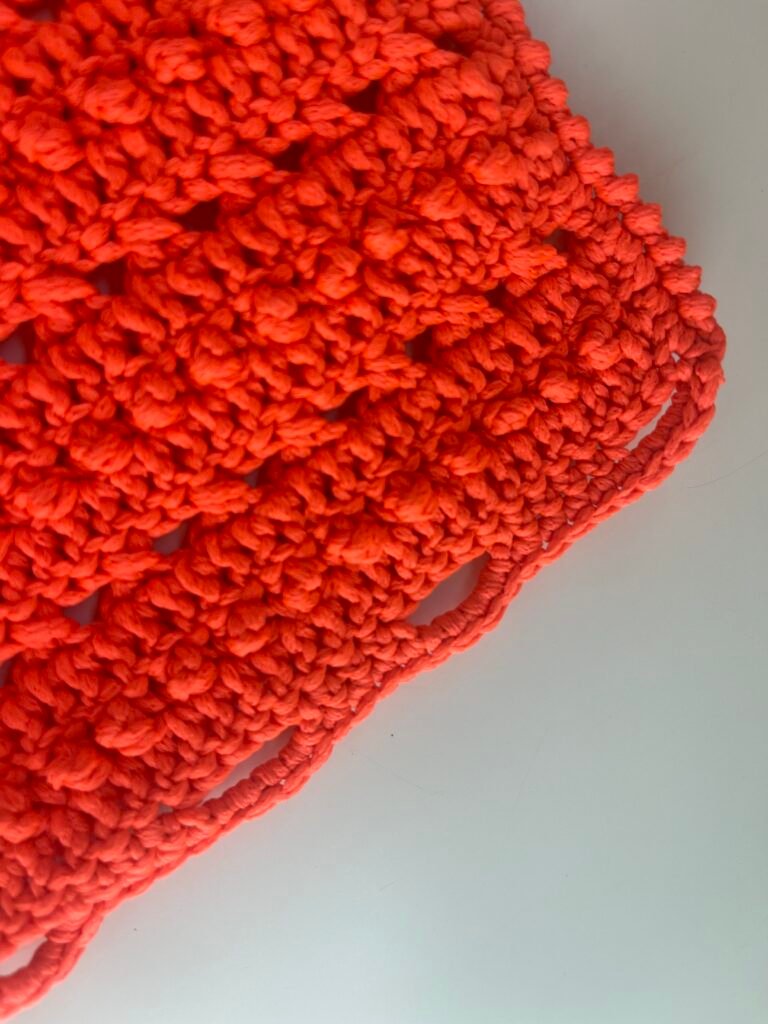
1. – Eyelets –
In this row we will make some eyelets that will later hold the cord that creates the corset-style closure of our top.
They are worked along the short sides of the rectangle.
Row 1: Ch 1, 1 sc, ch 1, skip 1 stitch, 1 sc, *ch 2, skip 2 stitches, 1 sc*. Repeat from * to * to the end. Ch 1 and turn.
Row 2: 1 sc in each stitch and 2 sc in each 2-ch space you come to. Fasten off and weave in the end.
Repeat rows 1 and 2 on the other end.
2. – Top and bottom edges –
With the right side facing you, join the yarn at one of the corners of the top.
We will work a first row of sc along that whole long side of the rectangle, following this approximate sequence:
- 2 sc for each dc row
- 1 sc for each Bub row
- 1 sc for each Cross row
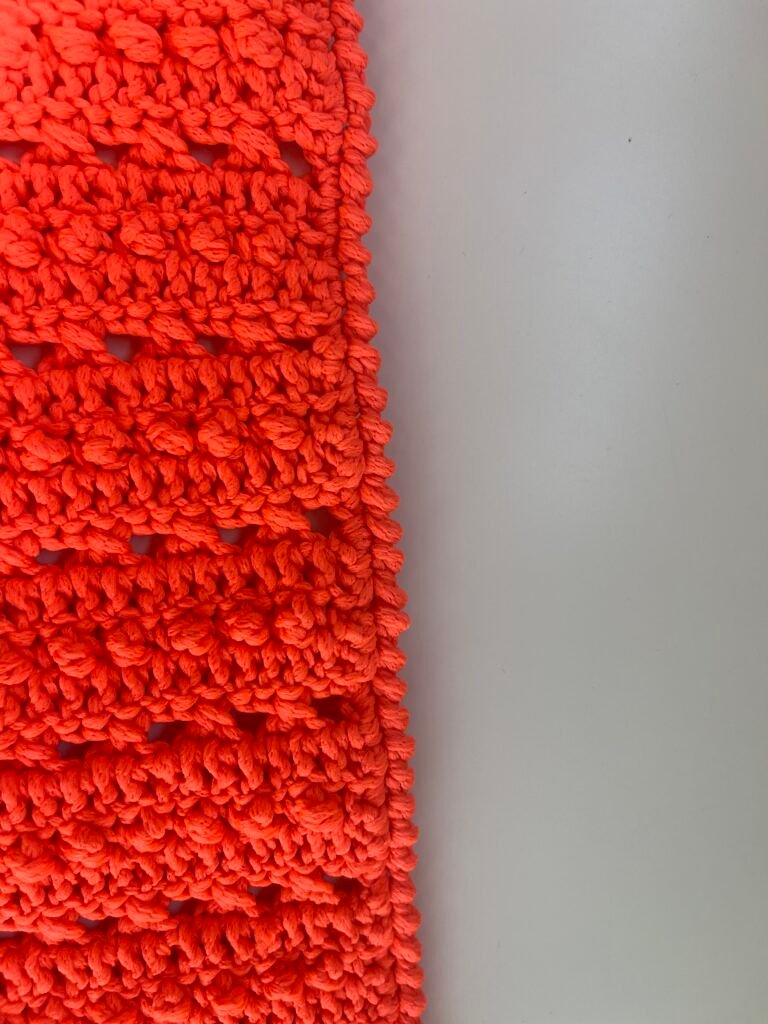
Without turning, continue with the second and last row: 1 rev sc (see the Crab Stitch video below) in each sc to the end. Fasten off and weave in the end.
Repeat this section on the other long side of the rectangle.
VIDEO TUTORIAL | CRAB STITCH | ENGLISH AUDIO AVAILABLE
CORD:
Chain about 160 to 180 cm (63–71 in).
Example: in my case I chained 350.
Ch 1 and turn.
Work back with 1 sl st in each ch, in the back bump of the chain (third loop). Fasten off and weave in the end.
End of the pattern.
What did you think? I’ll read you in the comments.
And, by the way, here is a really cool video of my friend wearing this top, bikini or bandeau. Freshness and fun are the words that come to mind when I see her.
And if you’re as in love with this texture as I am, I invite you to crochet the most coquette design you can imagine: the Luz Top, the original and genuine one.
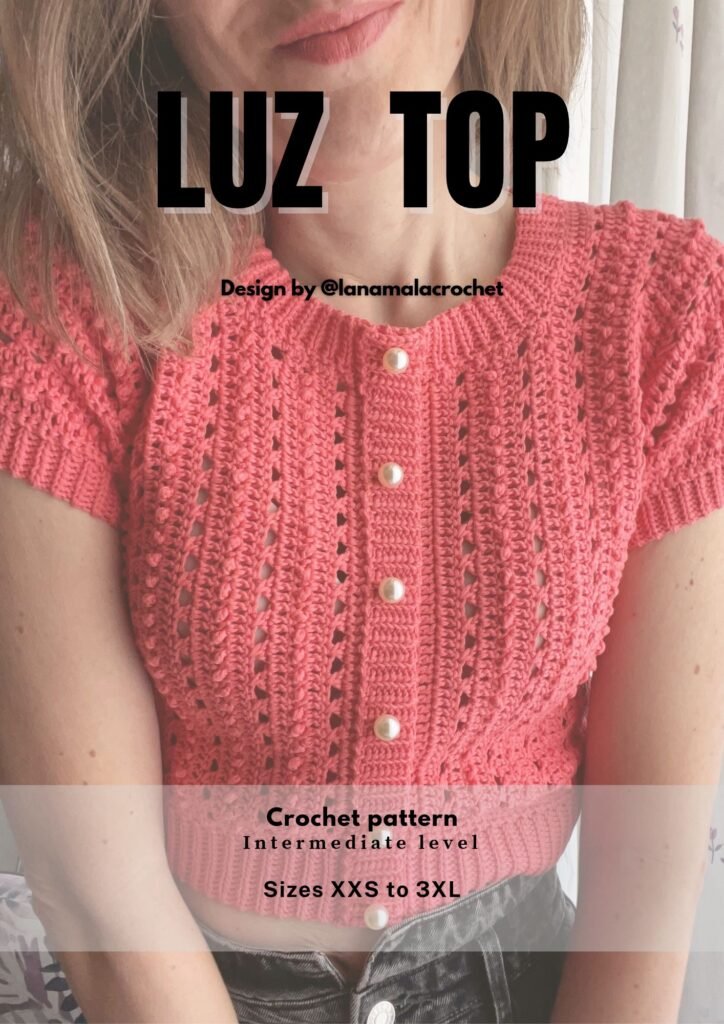
You can get this pattern, written for 8 sizes, at:
- My Shop: www.lanamalacrochet.com
- My Etsy:
- My Ravelry:
Happy crocheting, and see you soon.
Ana Vázquez
Lana Mala Crochet